UV Unwrapping
UV unwrapping is how we get the texture to fit on an image. Think of it as cutting the mesh into pieces so that it can be laid out flat.
Step 15
Press TAB to go into Edit mode. Press CTRL+NUM1 to go to Back view.
Press CTRL+TAB and select Edge in Mesh Select Mode popup.  Right-click on the center edge of the center to select it. Press CTRL+E
to bring up the Edge menu, and select Mark Seam. This marks the place
where the UV map will be cut when you unwrap it. Press CTRL+TAB and
select Vertices to return to Vertex select.
Right-click on the center edge of the center to select it. Press CTRL+E
to bring up the Edge menu, and select Mark Seam. This marks the place
where the UV map will be cut when you unwrap it. Press CTRL+TAB and
select Vertices to return to Vertex select. 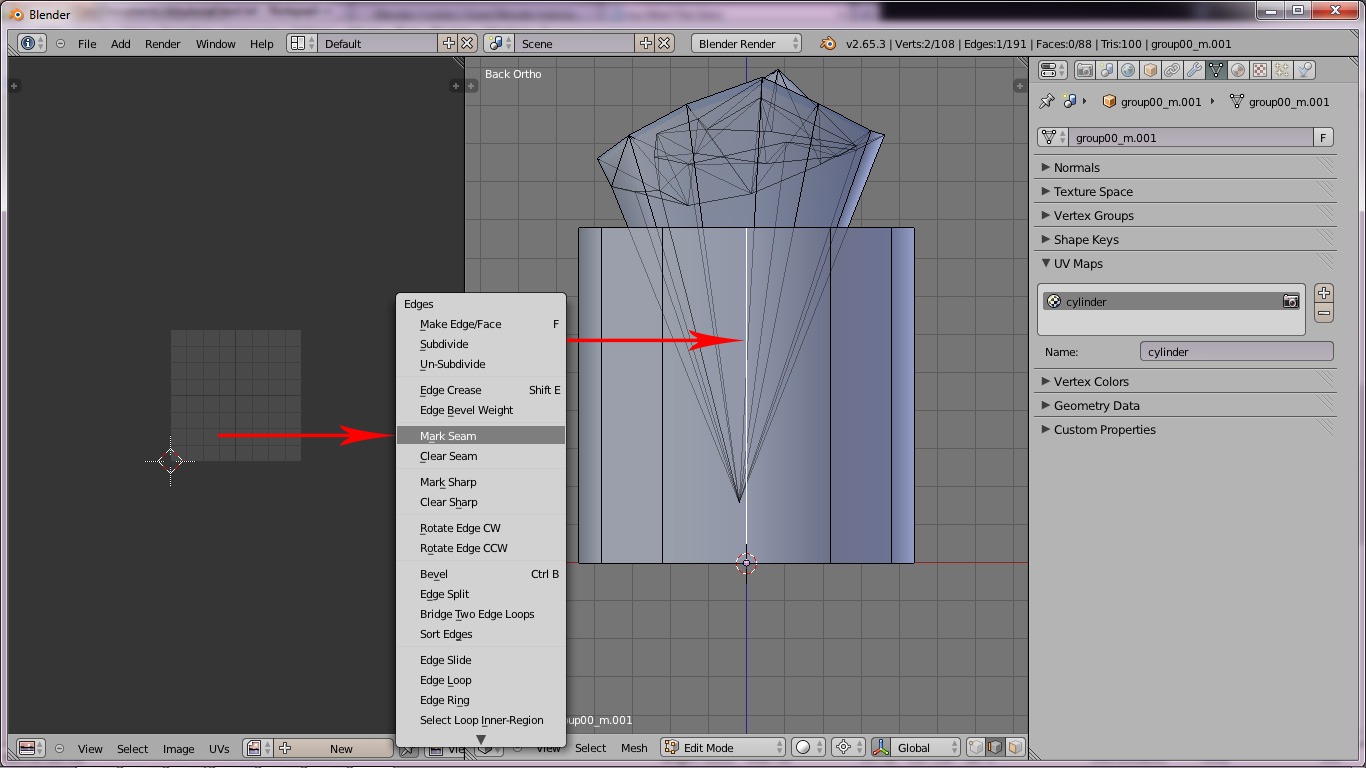
Step 16
Press B to Box select the top vertices of the cylinder. Do the same to
the bottom vertices. Press U and select Unwrap from the menu. This
unwraps the cylinder in the UV/Image editor. 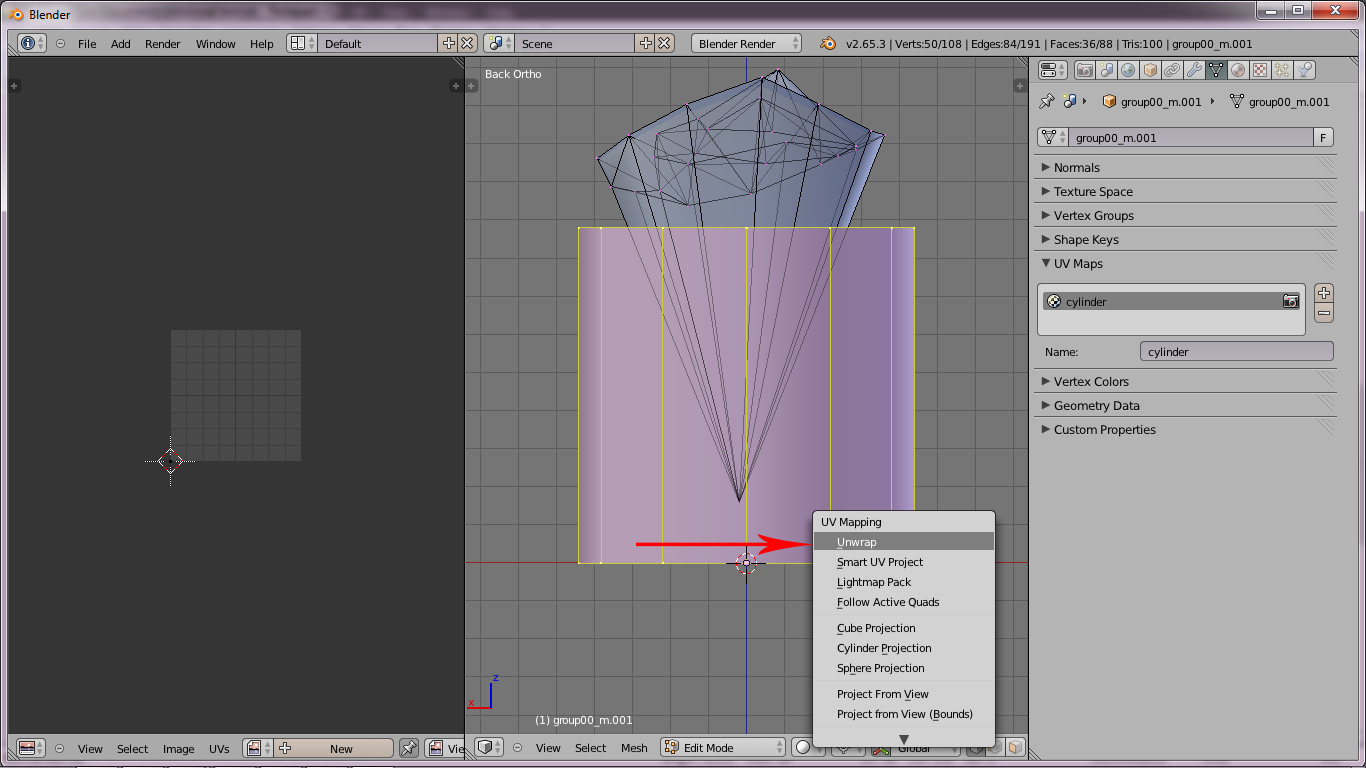 Press T to open the
Toolshelf and at the bottom in the Unwrap options, chane the method to
Conformal. Press T again to close the Toolshelf.
Press T to open the
Toolshelf and at the bottom in the Unwrap options, chane the method to
Conformal. Press T again to close the Toolshelf. 
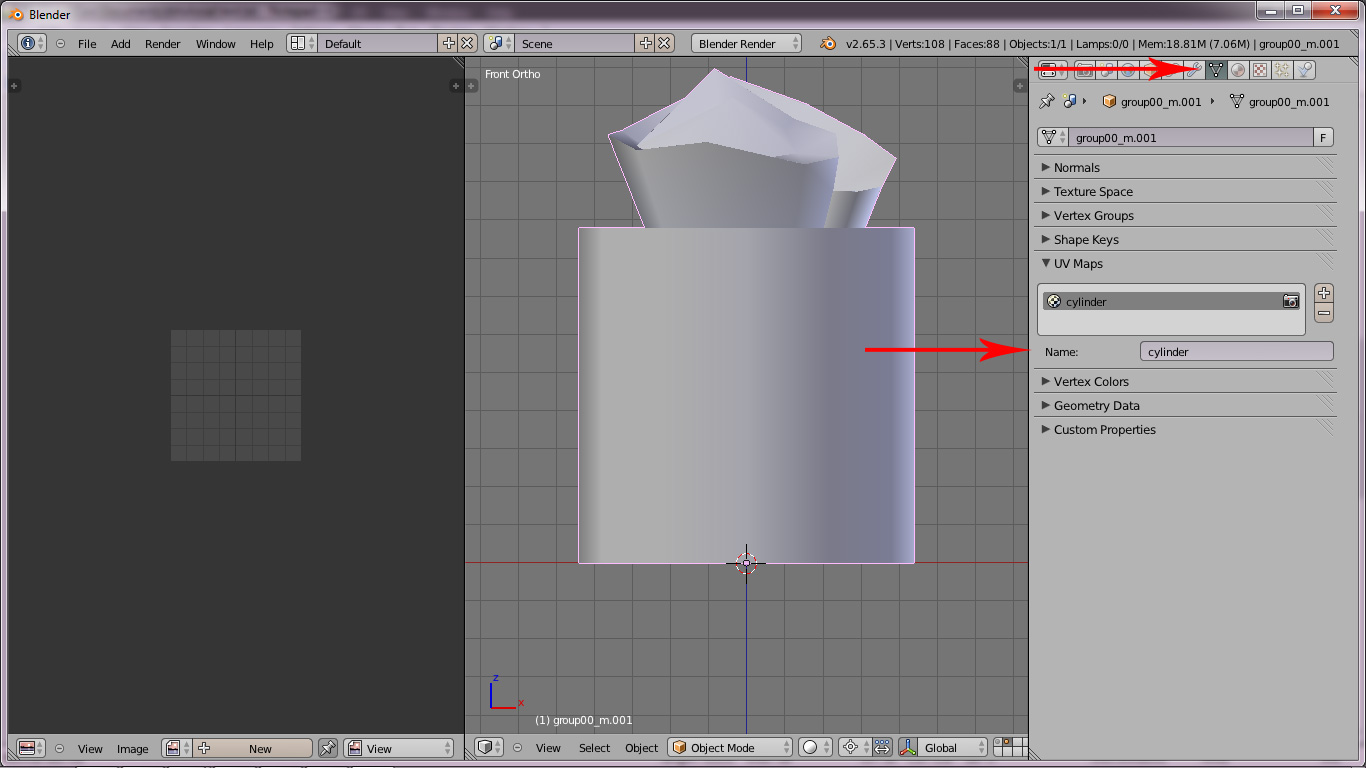
Step 14
Hold SHIFT and right-click on the tissue object to add it to the selection. Press CTRL+J to join the two objects into one. In the Properties Editor, click the Object Data button(triangle with dots at corners). Under UV Maps, change the Name to something else i.e. cylinder.